01-时间控制
前言
K-watch板载了一个时钟电路,可以对时间进行操作读取。我们这里提供了三种使用方法,让大家进行学习使用
积木说明
| 序号 | 积木 | 说明 |
|---|---|---|
| 1 |  | 所有:得到的是个元组 (年月日周时分)秒 |
| 2 |  | 设置当前时间 |
| 3 |  | 控制时钟的运行状态 默认不设置的情况下是开启状态 |
| 4 |  | 在未来板联网的前提下 可以进行网络时间更新到时钟芯片的时间 |
程序案例
示例程序📋:计时器
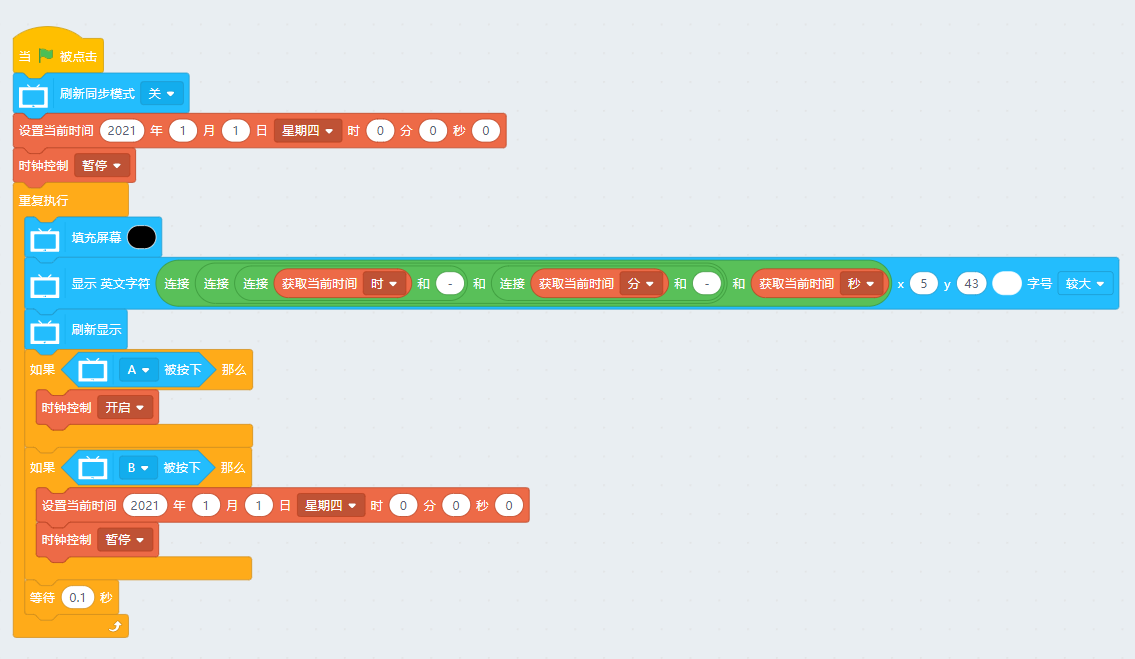
通过时钟的暂停和开启模式,结合时间写入和读取,将我们的时钟芯片制作出一个计时器的效果。
实现原理:
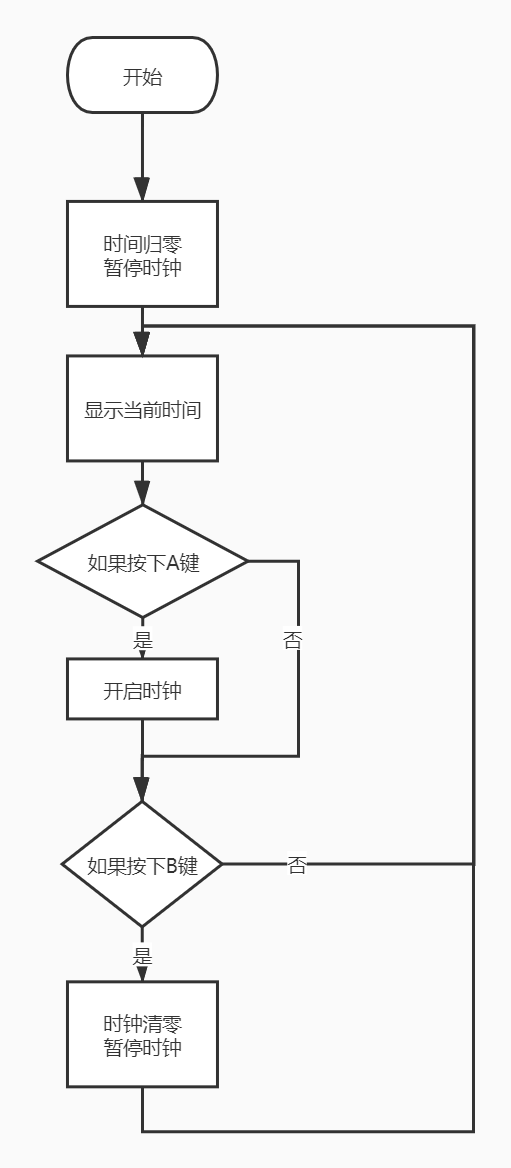
开机之后,将时钟的小时、分钟、秒钟,数值归零,暂时时钟的运行,然后,当按下A键的时候,启动时钟,这个时候时钟的数值就是从0开始,显示时间为计时内容。
当按下B的时候,将时钟的各个数值归零,暂停时钟的运行
流程图

#/bin/python
from future import *

from kwatch import *

clock = KClock()

from time import sleep

x = 0

screen.sync = 0
clock.setTime((2021,1,1,4,0,0,1))
clock.modeSet(state='pause')
while True:
  screen.fill((0, 0, 0))
  screen.text(str(str(str(clock.getTime('hour'))+str("-"))+str(str(clock.getTime('minute'))+str("-")))+str(clock.getTime('second')),5,43,2,(255, 255, 255))
  screen.refresh()
  if sensor.btnValue('a'):
    clock.modeSet(state='open')
  if sensor.btnValue('b'):
    clock.setTime((2021,1,1,4,0,0,1))
    clock.modeSet(state='pause')
  sleep(0.1)
示例程序📋:时钟写入和显示
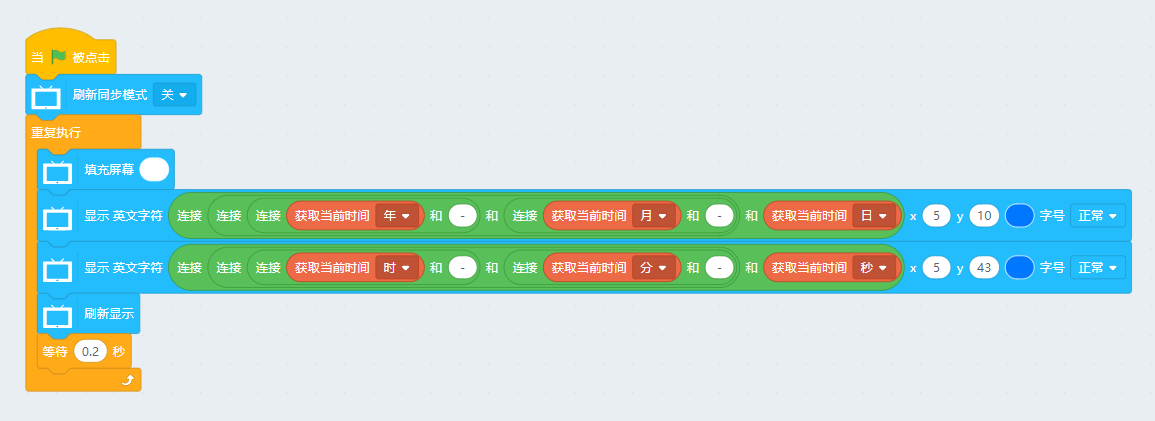
Step1 以下程序为写入时间内容,可以修改为当前时间
#/bin/python
from future import *

from kwatch import *

clock = KClock()

x = 0

screen.sync = 0
clock.setTime((2021,3,9,2,22,50,1))
screen.fill((255, 255, 255))
screen.text(str(str(str(clock.getTime('year'))+str("-"))+str(str(clock.getTime('month'))+str("-")))+str(clock.getTime('day')),5,10,1,(0, 119, 255))
screen.text(str(str(str(clock.getTime('hour'))+str("-"))+str(str(clock.getTime('minute'))+str("-")))+str(clock.getTime('second')),5,43,1,(0, 119, 255))
screen.refresh()
Step2 下载时间显示程序
#/bin/python
from future import *

from kwatch import *

clock = KClock()

from time import sleep

x = 0

screen.sync = 0
while True:
  screen.fill((255, 255, 255))
  screen.text(str(str(str(clock.getTime('year'))+str("-"))+str(str(clock.getTime('month'))+str("-")))+str(clock.getTime('day')),5,10,1,(0, 119, 255))
  screen.text(str(str(str(clock.getTime('hour'))+str("-"))+str(str(clock.getTime('minute'))+str("-")))+str(clock.getTime('second')),5,43,1,(0, 119, 255))
  screen.refresh()
  sleep(0.2)